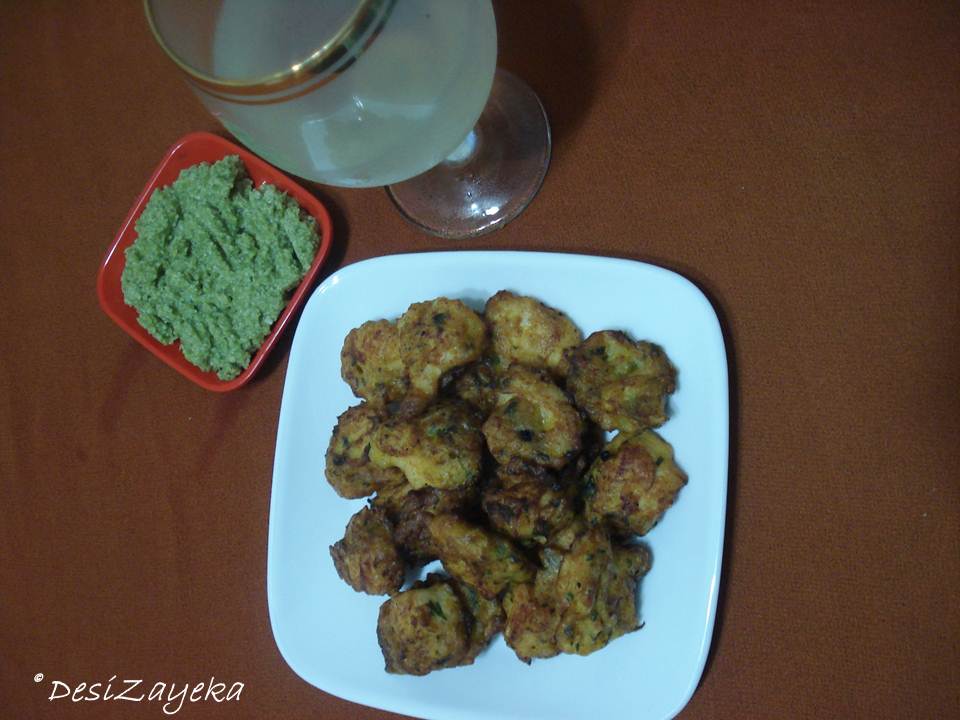
Batata Vada

A Yummilicious Healthy Treat...

Indianized Lemonade

You will fall in love with this spiced up lemonade... Perfect to beat the heat!

Burrito Inspired Open Sandwich

A Fusion Sandwich perfect for evening snack...

Chicken Biryani

Every Indians Favorite...

Shrikhand - Indianized Greek Yogurt

Something sweet for your sweet tooth!!!

Smart People :)

Showing posts with label kids variety. Show all posts

Saturday, March 24, 2012

Mozzarella Sticks


This snack is to die for if you are a cheese lover, like I am... We always order this from our local Pizza shop and at UNO's, we always used to wonder how exactly they make this sinful delicious side dish. This was when I was in my teens. Later on, I got so addicted to making everything at home and tried variety of recipes from all over the world but never tried to make these sticks; until the other day, my niece mentioned it to me and said she loves it. I decided to make this for her. I went on Google and searched variety of recipes and finally decided to make my own recipe for it, a bit spiced up and a bit Indianized, may I add. :)


Ingredients:
  1. Store bought mozzarella sticks
  2. One cup all purpose flour
  3. One cup Italian bread crumbs
  4. One beaten egg
  5. One tblsp red chili powder
  6. One tbsp chaat masala
  7. Oil for deep frying
Process:
  1. In a bowl, mix together bread crumbs, red chili powder, and chaat masala, keep aside.
  2. Dip sticks in all purpose flour (one by one).
  3. Dip floured sticks in egg and coat well (one by one).
  4. Roll egg coated sticks in bread crumb mixture (step 1). 
  5. Again, dip the crumb coated sticks in egg and coat well (one by one). 
  6. Again, roll egg coated sticks in bread crumb mixture (step 1) (one by one). 
  7. Keep the double coated sticks on a plate and put it in the refrigerator for 10-15 minutes. 
  8. In the meanwhile, heat oil for deep frying the sticks. 
  9. One oil is well heated, add two sticks at a time and deep fry till golden brown. 
  10. Keep fried sticks on the paper towel for excess oil to be drained out. 
  11. Serve hot with ketchup....


After making this dish, I had to do my food photography session, my niece was very patience throughout the whole process, however at the end she could not hold herself back and kept wandering around the plate full of this delicious snack... You can see the innocence in her eyes... Isn't she the cutest baby!!! I love her to death... 

This post is dedicated to my little niece... Love you Gudda... 


ENJOY!!!


Friday, February 24, 2012

Chili-Garlic Bread/Toast


Hello all beautiful people out there... 

It has been crazy busy with the tax season. I get home at 7-7:30 leave at 8:30 in the morning. Working Saturdays and Sundays!! But, it is much more peaceful, since I am working for myself now! Yes! I am my own boss and it feels so good! Now I always think, why I didn't do this earlier. But anyways, its never too late!


Coming to my quick and easy snack, yes I need a lot of these kind of recipes for the busy season. This is one of the best tea time snack, I have came up with so far. You have to try it to believe me... 

Ingredients:
1. Three slices of bread, sides removed.
2. Two tblsp (each)- green, red, and yellow pepper - finely chopped
3. Three cloves of garlic - finely chopped
4. Two tblsp - butter at room temperature
5. Red chili flakes - per your desire (optional)


Process:
1. Mix together all the ingredients from #2 to #5 above.
2. Spread it on the three bread slices.
3. Toast in it mini oven for 5-6 minutes.


ENJOY!!! 

Thursday, February 9, 2012

Mexican Pizza


Where do I even start with for this delicious, quick, and easy snack item. This has been a life-time saver after Maggie of course! I normally make this pizza when I am really hungry but don't necessarily have enough time to do something fancy. This pizza is very filling and more importantly it is loved by dear Hubby, as well. He doesn't like the American pizzas with melted cheese but he loves Indian Pizza and this Mexican Pizza. Don't ask my why 'cause I am still trying to figure why it is the way he is :)

Ingredients:
1. Plain flour tortilla (I used store bought one).
2. One can of pinto beans (store bought).
3. Three tblsp Salsa (store bought).
4. Guacamole - four to five tblsp.
4. Half green bell pepper - chopped.
5. Mexican four cheese - as much as you need!

Process:
1. Preheat oven at 350 degrees F.
2. Place tortilla on a Pizza Pan, evenly coat tortilla with salsa.
3. Evenly spread guacamole, place pinto beans over salsa and guacamole.
4. Sprinkle chopped green bell pepper and cheese.
5. Bake for 10 minutes or till cheese is melted.
6. Serve hot!!!


ENJOY!!!

Monday, December 5, 2011

Corn Chaat


Corn Chaat is such an amazing and tempting delicacy. It will make you drool like crazy while you are prepping for it. No kidding… I WAS drooling so bad!  I first had this in India, obviously, when I went to get married five year ago. Yes, five years anniversary is on December 8th! So I and my hubby went for a walk at Kankaria Lake in Ahmedabad and I happen to saw this cart that was so crowded and the only thing it had said on it was Corn Chaat/Makai Chaat. I asked my hubby, if he had tried this before and he hadn’t. So, both of us went to the cart and got our corn chaats in small ice-cream styled cups, with a little plastic spoon. The look of the chaat was so colorful and it smelled heavenly. I cleaned up the little ice-cream cups in a matter of few seconds and went back for another one. I had three servings of corn chaats that day! Yes, I am a chaat maniac.


Since that day, I always kept thinking to make this at home but never did. Don’t have a valid reason for not trying but you know how it is. Before my trip to India, my mom had done a Barbeque party at her place and had invited me over. Along with the regular barbequed items, she also bought a lot of corn cobs. However, by the end of the barbeque we were all so full and did not had the corn cobs. So my mom gave me couple of corn cobs to take home with me (Moms are so cute and caring when it comes to food & daughters). The cobs were thrown in to the fridge for about a week, and were forgotten about. One day, I came home early from work and was trying to decide what to make, when I saw those corn cobs and decided to make this chaat. Yes, unbelievable, it took me almost four and half years to make this chaat at home. I am sure we all have one of those lingering dishes that we want to try but never do, can you tell me yours?

Heading to the recipe now:

Ingredients:

1. Two cobs of corn – boiled and the corn kernels removed. You can also use the frozen ones.

2. One medium potato – boiled and finely chopped.

3. One small green bell pepper – finely chopped.

4. One small onion – finely chopped.

5. One small tomato – finely chopped.

6. A bunch of fresh coriander – finely chopped.

7. One cup sweetened yogurt.

8. One tblsp chaat masala (store bought).

9. Salt per taste.

10. Two or three tblsp coriander chutney (I used store bought SWAD brand).

11. Half cup thin sev (store bought).


Process:

1. In a bowl, mix together corn kernels, potatoes, tomatoes, onions, bell peppers, coriander, chaat masala, and salt.

2. Place the corn mixture in serving bowls.

3. Place a dollop of sweetened yogurt, followed by coriander chutney, followed by sev.

4. Serve immediately.


ENJOY!!!

Reposted this recipe at http://desizayeka.blogspot.com/2012/07/ramadan-collections.html
Submitting to the following events (see further details at the link above):

Joy from Fasting to Feasting - V

Ramadan Friendly Recipes

Wednesday, November 9, 2011

Chicken Pakora


During my childhood years, I had never imagined that I would be eating chicken pakoras in my adult years. As we were growing up, onion pakoras, mirchi pakoras, bread pakoras, aloo pakoras were the only pakoras that we would eat. Never imagined a non-vegetarian pakoras!! Time has changed, and so has the cooking. Things are being mixed and matched, creating more fusion food than ever before. 

I first had chicken pakoras at one of our family friend's house and I so fell in love with it. It is fairly simple to make and tastes so good. It is a must try!

Ingredients:
  1. Boneless Chicken - half a pound - cut in small cubes
  2. Tempura Batter Mix
  3. Fresh coriander - a bunch - finely chopped
  4. One medium onion - finely chopped
  5. 4-5 green chilies - finely chopped
  6. Oil for deep frying
     Process:
    1. Mix all the ingredients, except oil, using a warm water. 
    2. The batter should be of medium consistency - not too thick, not too thin.
    3. Keep marinated for about an hour. 
    4. Heat oil in a wok, and deep fry pakoras till golden brown. 
    5. Serve hot with green chutney or ketchup. 

    ENJOY!!!

    Reposted this recipe at http://desizayeka.blogspot.com/2012/07/ramadan-collections.html
    Submitting to the following events (see further details at the link above):
    Joy from Fasting to Feasting - V


    Ramadan Friendly Recipes

    Friday, July 22, 2011

    Bread Pakora


    Shruti Kakkar: "Kya pata, aaj frendship kar raha hai, kal I love you bol dega." (Who knows, you are making me friend today, tomorrow you will tell me "I Love You".
        
    Bittu Sharma: "Nahi yaar, BREAD PAKORE ki kasam, aisa kuch nahi hoga." (No, this won't happen, I swear by Bread Pakora!)

    The above dialogues are from Band, Baaja, Barat movie... One of my all time favorite movie!! It was not till I watched this movie that I realized how much Bread Pakoras are famous in Delhi, India's Capital. I always thought that this was the snack that my buaji (Dad's sister) invented and is only eaten in our family.. oh Gosh, how childish I was am :).


    I later on met couple of my friends from Delhi and asked them about bread pakoras and found out that this is one of the local street snacks just like Pani-puri & Dhoklas of Gujarat and Vada-Paus of Mumbai. Buaji used to make this snack for us every now and then and it was our all time favorite dish. I actually learned this from her. I would like to dedicate this post to my Buaji who has always been there for me us, in our good and bad times; for fulfilling all of our random demands of food, such as home-made samosas, dhoklas, handwa, Dahi-bade, noodles, chana-chatpati, and much more. She is a great person to be with and is an excellent cook as well. If I can only be half of how she is, I would feel my life to be fulfilled!!!!

    Bread Pakoras are very easy to make and can be served as a tea-time snack or guest serving. Bread Pakoras are famous as an Iftar item in our household. I am sending this recipe to Iftar Moments event hosted by Sister Ayeesha of Taste of Pearl City and to What's everyone Having for Iftar event hosted by Sister Roha of Hyderabadi Cuisine Recipes.


    Ingredients:
    1. Two medium potatoes - peeled, cubed, and boiled.
    2. A bunch of fresh coriander leaves
    3. Two-three green chilies - finely chopped.
    4. 1/4 tsp Turmeric Powder
    5. One tblsp lemon juice
    6. Salt per taste
    7. For tempering - half tblsp cumin seeds, half tblsp mustard seeds, and two tblsp oil.
    8. For Batter - Half cup chickpea flour, 1/2 tblsp red chili powder, 1/2 tblsp dhaniya powder, a pinch of turmeric powder, salt per taste, and Half cup warm water.
    9. Six breads - cut diagonally
    10. Oil for deep frying.

    Process:
    1. Mash boiled potatoes, add in coriander leaves, lemon juice, green chilies, salt and turmeric powder. Mix well, add a little bit of water (only if needed).
    2. Heat oil for tempering, add in cumin and mustard seeds, let it splutter, then sprinkle over potato mixture and mix well. Keep aside.
    3. The potato mixture should look like this filing that I had previously made for Aloo Paratha.
    4. Mix all ingredients for batter - make sure there are no lumps of chickpea flour and the batter should be more towards the thicker side. Adjust water quantity as needed.
    5. Spread some potato mixture on the one of the diagonally cut bread, place the second bread on top and press tightly. Repeat the process for rest of the breads.
    6. Heat oil for frying.
    7. Dip the potato filled breads into the batter and deep fry till golden brown. Repeat for the rest of the sandwiches.
    8. Serve hot with some tomato ketchup.

    Do give these a try, you will start swearing by Bread Pakoras!!! Bread Pakore ki Kasam Yaar!!! :)

    ENJOY!!!

    Reposted this recipe at http://desizayeka.blogspot.com/2012/07/ramadan-collections.html

    Submitting to the following events (see further details at the link above):
    Joy from Fasting to Feasting - V


    Ramadan Friendly Recipes

    Tuesday, April 19, 2011

    Dosa/Uttapam Cakes

    My last post was on January 25th 2011. I HAD to take a break from blogging due to extensively, ridiculously, absurdly, harshly, outrageously, unreasonably (let’s see did I got all the adjectives??) amount of work and ‘other’ activities that I was involved in for past four months or so. My regular readers know that I am a CPA and work at a CPA firm in Boston, so they would know why I was gone; but hold on, there is more to it. At work, my new year’s present was new clients with tight deadlines; In terms of education, my new year’s present was taking full time classes, in order to comply with CPA licensing rules; and personally, my new year’s present was to hunt for a condo. Needless to say, I was delighted to receive such a wonderful set of presents from three different parts of my life.


    Working more than full time, like 65-70 hrs. a week, (is it called overtime? No wait, we don’t get paid for it, so I don’t think it’s called overtime); taking full time classes; and searching for condos in a little time that I was able to find from my crazy schedule. At the end of it all I had no time to cook, no time to write, no time to take pictures, no time to bore you guys :( - resulting in a very unwanted break from my dearest hobby that I had developed in past few years.

    Now that the busy season has ended, it is kind of slowing down a bit. Work is normal again 45-50 hrs. a week. The classes will be over soon (May 6th to be exact). The condo project – didn’t exactly come out the way we had thought. After looking at trillion places, we really liked a place which was closer to everything and fitted our needs. We went whole nine yards with the process and were three weeks away from the closing and found out that there was a major issue with the title and the title insurance company backed out on us and it didn’t seemed smart to go ahead with the deal. We ended up backing out as well and decided to rent for now. To tell you the truth, I don’t have any more strength to look for a new place. I really liked the one that we were planning to buy so everything new that I see now, I tend to compare it to the older one. Anyways, we will be moving in mid-May (am I hearing another break? – no definitely not!) I am not compromising this time.

    With all this that happened with me in these few months – A LOT has happened in the world as well – good and bad. The unrest in Egypt, Earthquake and Tsumani in Japan, the upheaval in Libya, India’s world cup victory, Anna Hazare’s stand against corruption (a much needed stand I must say!). My prayers go out to all who have been affected by these nature and man-made destructions and my wishes goes to people of India for their great victory after 28 years!

    So, like I said earlier, I wasn’t really cooking or rather didn’t really had time to cook, so Mom and Sis-in-law came to the rescue. I love them – they are totally understandable and know what I have been going through and never expressed their disappointment. I am making up for them now :). Mom made these really yummy masala dosas (I will post a recipe soon). We had a lot of batter left and as some of you might know, it does not last that long. I came up with this really cool idea to make dosa cakes out of the batter instead of throwing it away, as you all know, I hate to waste foods.

    Ingredients:

    1. Dosa batter – 2 cups – click here for recipe
    2. One medium onion – finely chopped
    3. One medium tomato – finely chopped
    4. One small green pepper – finely chopped
    5. Two small green chilies – finely chopped
    6. Handful fresh coriander leaves – finely chopped
    7. Cooking oil spray

    Process:

    1. In a medium bowl, mix together, dosa batter, chopped onions, tomatoes, green pepper, green chilies, and coriander.
    2. Let it sit for about 10 minutes.
    3. Heat oven at 350 degrees.
    4. Spray oil in muffin tray
    5. Pour the mixed batter in each muffin spots till it is half covered – don’t overfill.
    6. Place the tray in the oven.
    7. Let it cook for 10-15 minutes.
    8. Insert a toothpick in each cake; if it comes out clean, it’s all done.
    9. Serve warm with tomato-garlic chutney.

    All of us really loved these cakes and they are so filling as well. Do give them a try!


    ENJOY!!!

    Reposted this recipe at http://desizayeka.blogspot.com/2012/07/ramadan-collections.html

    Submitting to the following events (see further details at the link above):
    Joy from Fasting to Feasting - V

    Ramadan Friendly Recipes

    Friday, November 26, 2010

    Jeera Puri


    Puri is an unleavened Indian bread/snack/cookie (??). Very popular in Northern part of India, puri's are best served as a breakfast and lunch item. Puri is very common in our household, as we are from Gujarat and Puri is a must in a Gujarati Thali. However, the one that I am going to show you today is more of a tea-time snack instead of a regular meal item. These jeera (cumin seeds) puri is best when travelling. We made some for my brother and sister in law, as they were leaving for Hajj. These came out so good!!

    Ingredients:
    1. All-purpose flour - One cup.
    2. One tsp cumin seeds - grind to powder
    3. Salt per taste
    4. 3/4 Cup warm water
    5. Oil for frying.
     Process:
    1. In a bowl, mix together flour, one tblsp oil, salt and cumin powder.
    2. Add water slowly and make it into a dough; knead well.
    3. Note: The dough should not be too soft or too hard.
    4. Make a quarter size balls out of the dough - should make about 25.
    5. Roll it out into small puri.
    6. Take a knife and place some cuts throughout the puri.
    7. Deep fry in piping hot oil till golden brown.
    8. Store in an airtight box.
    ENJOY!!!

    Wednesday, November 24, 2010

    Banana-Kiwi-Strawberry Smoothie


    So for past two weeks or so, my older brother and sis-in-law went for their first Hajj!! As exciting the experience would be for them... It was equally exciting on my part as my niece stayed with us for the entire time. You will find more details on my niece here. She is the most adorable, cutest, naughtiest, and fun-loving kid I would ever know. So her being around the house, every now and then, I try to make something with milk, so she would drink it without any tantrums :).. I made this smoothie over the weekend and I know she loved it. How? Well......

    Ingredients:
    1. One banana - cut in cubes
    2. Three-four strawberries - halved
    3. One kiwi - sliced
    4. One and a half cup cold milk
    5. Sugar - about three tsp (you can adjust it according to your taste buds).
    Process:
    Grind together all the ingredients in a food processor. Serve cold!

    ENJOY!!!

    Related Posts Plugin for WordPress, Blogger...